How to Stake IOTA: Complete Beginner's Tutorial
Step-by-step tutorial for staking IOTA tokens. Learn how to set up your wallet, choose validators, and start earning rewards fast.
What You'll Learn
- Set up the IOTA Wallet
- Choose a validator using reliable data
- Stake IOTA
- Track rewards; switch or withdraw
Time: ~10–15 minutes
Difficulty: Beginner
Prerequisites: IOTA in your wallet
Before You Start
Requirements
- IOTA Wallet (browser extension)
- ≥ 1 IOTA (minimum stake)
- Internet connection
- Seed phrase stored offline
Safety
- Never share seed phrase
- Install wallet from official sources only
- Verify validator details in wallet/explorer
- Test with a small amount first
Step 1: Set Up the IOTA Wallet
- Install the official IOTA Wallet extension (Chrome Web Store link via iota.org/docs).
- Create a new wallet profile.
- Write down the 24-word recovery phrase on paper; store offline.
- Fund the wallet:
- Copy your IOTA receive address.
- Withdraw IOTA from your exchange/wallet.
- Wait until balance shows in wallet.

Note: Firefly is deprecated on Rebased. Use the IOTA Wallet extension.
✅ Checkpoint: Balance visible on mainnet
Step 2: Open Staking
- In the IOTA Wallet, go to Stake & Earn (or Staking in the Dashboard).
- Connect the wallet if prompted.
- Review network status in wallet/explorer:
- Current APY (variable)
- Total staked
- Active validators
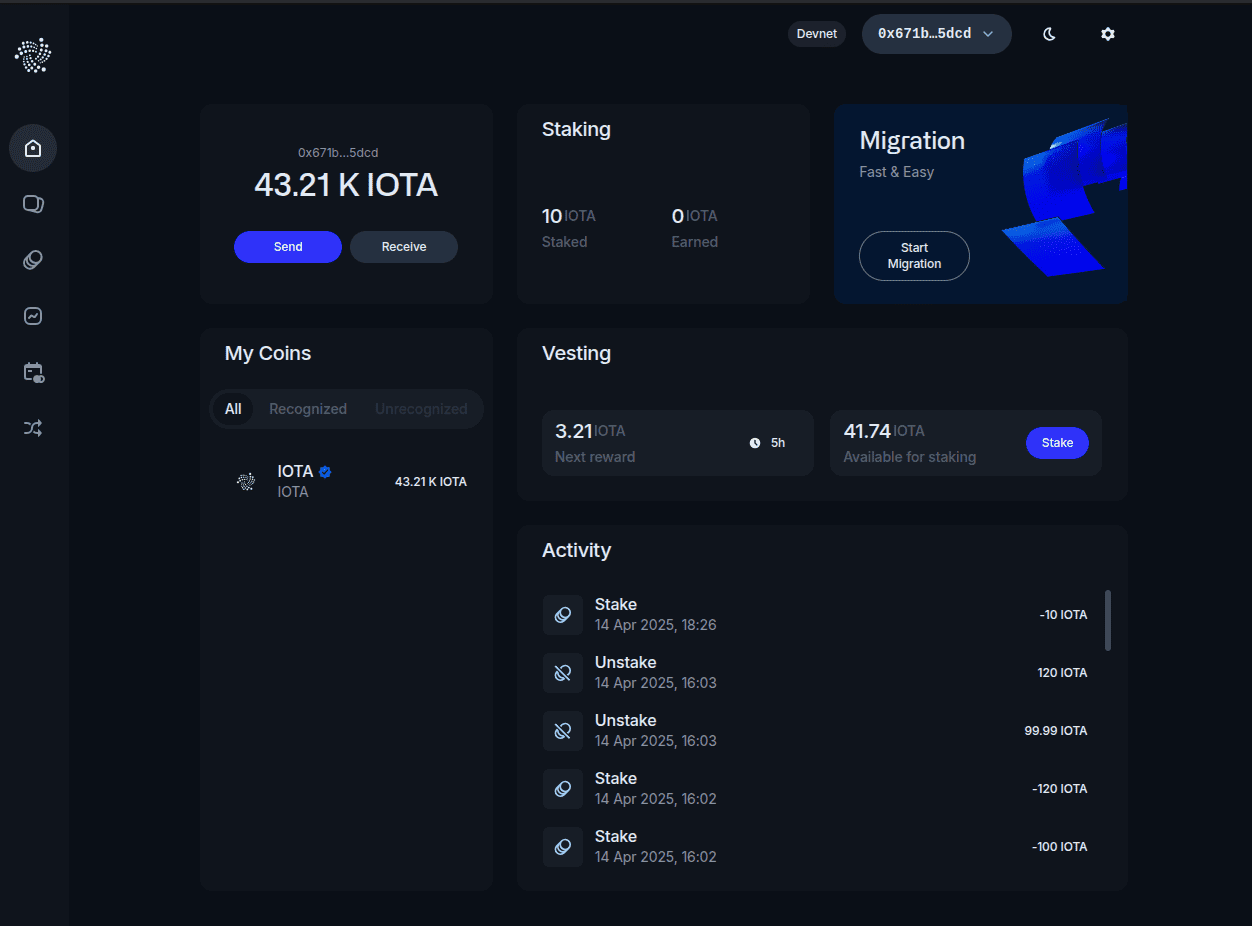
✅ Checkpoint: Staking screen shows available validators
Step 3: Choose a Validator
Selection criteria:
- Uptime/performance history
- Commission rate (verify; ranges vary)
- Pool size/distribution (avoid over-concentration)
- Clear operator identity and track record
Tools:
- Wallet validator list
- Official Explorer validators: https://explorer.iota.org/validators
How:
- Click Browse Validators.
- Filter/sort by uptime, commission, stake.
- Open a validator detail page; confirm address/pool ID.
- Click Select Validator.
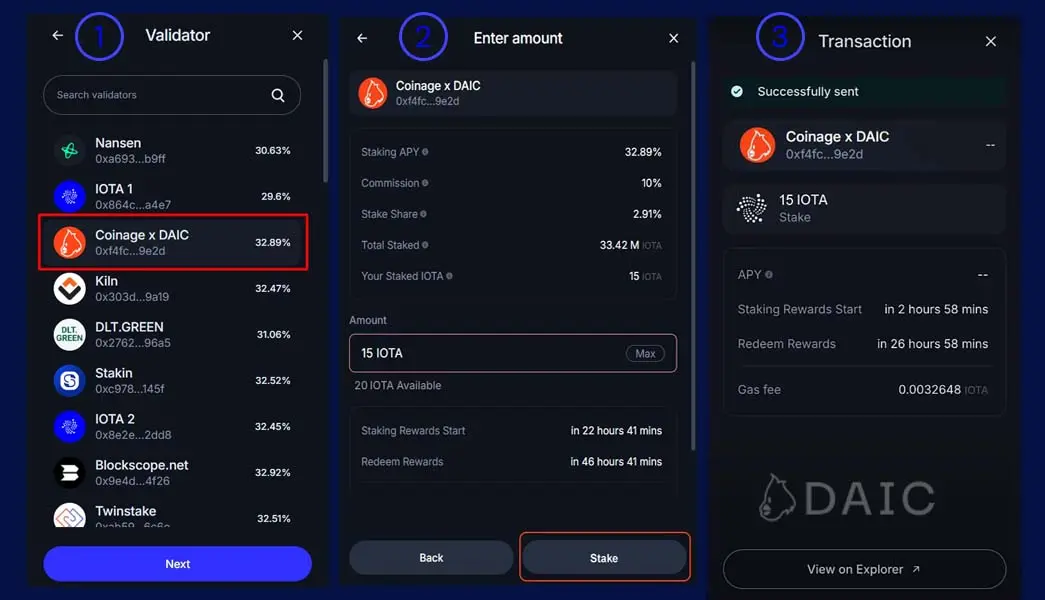
✅ Checkpoint: Validator selected
Step 4: Stake
Amount
- Minimum: 1 IOTA
- Keep a small IOTA balance for fees (do not stake 100%)
Execute
- Enter stake amount (or Max, leaving some for fees).
- Review:
- Validator name/address
- Stake amount
- Estimated fees
- Click Stake Now and confirm in wallet.
Processing completes quickly; track via Explorer link from the wallet.
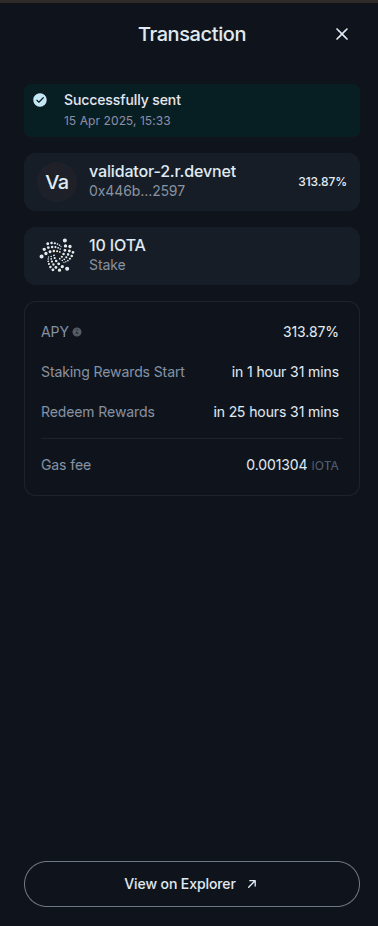
✅ Checkpoint: Status shows Staking Pending/Queued
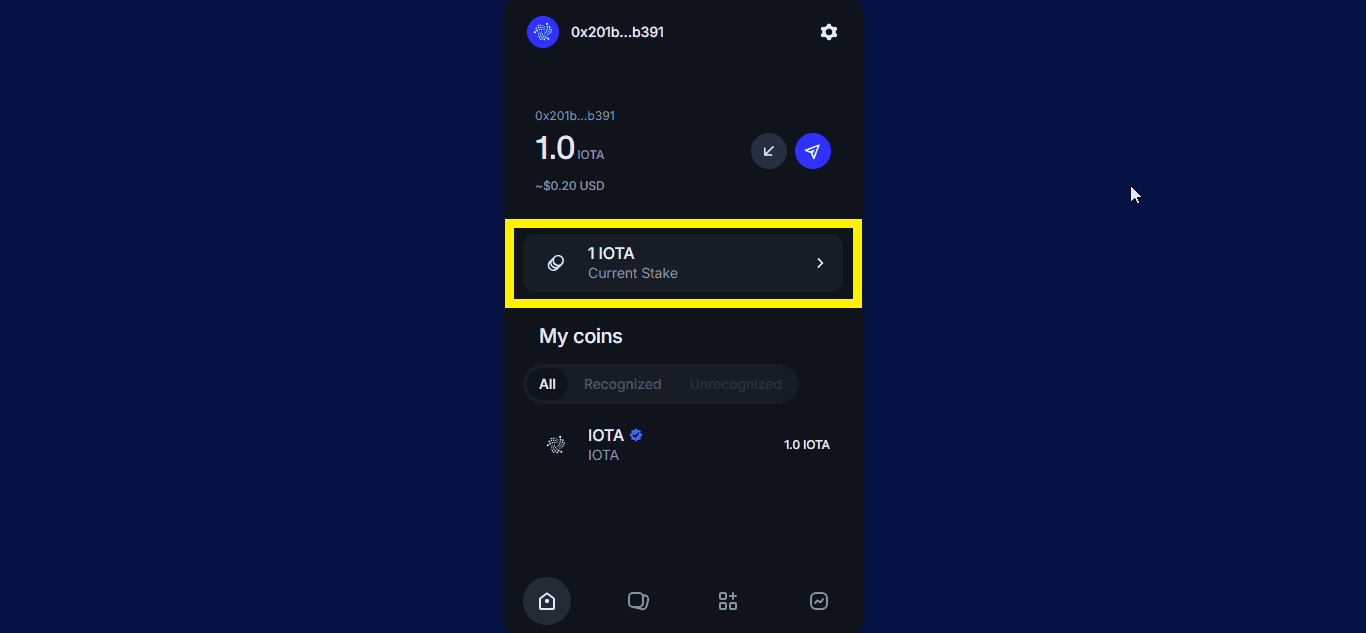
Step 5: Verify Activation
- Open My Stakes/Portfolio.
- Confirm:
- Stake amount
- Validator
- Status: Active after next epoch (~24h)
- Next reward timing
Bookmarks:
- Wallet Dashboard
- Explorer position for your stake/validator
Timeline
- Immediate: Stake tx confirmed; appears in portfolio
- Next epoch (~24h): Becomes Active; rewards start
- End of each epoch: Rewards auto-credited inside the pool (auto-compounding)
✅ Checkpoint: You know when rewards start
Step 6: Track Rewards
View in wallet:
- Total Staked
- Accrued Rewards (reflected via pool exchange rate)
- APY (indicative; varies)
Notes:
- Rewards compound automatically at epoch boundaries.
- No manual “claim” needed under exchange-rate model.
- To realize rewards to liquid IOTA, Unstake.
Optimize (Optional)
- Diversify across 2–3 validators to reduce operator risk.
- Reassess validator uptime/commission periodically.
- If a validator degrades, Unstake then Stake with another; changes take effect next epoch.
Troubleshooting
Transaction failed
- Ensure fee balance > 0
- Validator address verified
- Network set to mainnet
- Try a smaller amount
Rewards not visible
- Wait for next epoch to complete
- Refresh wallet/Explorer
- Check validator active status
Wallet connection issues
- Update wallet extension
- Clear site permissions/cache
- Try another Chromium-based browser
Validator missing
- Confirm you’re on mainnet
- Validator may be inactive/removed; pick another
Security
- Never share seed phrase
- Prefer hardware wallet support for large balances (Ledger when supported)
- Verify URLs and extension publisher
- Maintain multiple offline backups of the recovery phrase
Summary
Congratulations! 🎉 You've successfully completed the IOTA staking tutorial. Here's what you accomplished:
✅ Installed the IOTA Wallet — Set up your secure wallet with recovery phrase
✅ Selected a validator — Chose a validator using verifiable metrics and performance data
✅ Staked IOTA — Successfully staked your tokens and confirmed the transaction
✅ Verified activation — Tracked your stake status and understood the reward flow
✅ Learned management — Now know how to switch validators or withdraw when needed
Quick Reference Guide
Keep this handy for your staking journey:
| 📋 Action | 📍 Location | 📝 Notes |
|---|---|---|
| Check balance | Wallet → Home / Dashboard | View total staked + rewards |
| Stake more | Wallet → Staking → Stake | Add to existing position |
| Switch validator | Unstake → Restake | Takes effect next epoch |
| Unstake | Wallet → Staking → Unstake | Rewards paid at epoch end |
| View validators | IOTA Explorer | Check performance & APY |
💡 Pro Tip: Bookmark your wallet dashboard and the IOTA Explorer for easy access to your staking portfolio.
Related Articles
Continue your staking education with these guides:
- Understanding IOTA Staking Rewards — Learn how rewards are calculated and what affects your returns
- Welcome to IOTA Staking Blog — Discover more resources and tools for IOTA staking
Note: More guides coming soon, including Validator Selection Guide and Staking Optimization Strategies.
Tagged with:
Written by IOTA Staking Team
Expert in IOTA staking, blockchain technology, and DeFi strategies. Providing actionable insights to help you maximize your staking rewards.
Related Articles

IOTA Staking Weekly - Mar 23, 2026
Mar 23, 2026: IOTA staking at 11% APY with 50% of supply locked. Stake grew slightly this week, price down 10.35%.
IOTA Staking Weekly - Mar 16, 2026
Mar 16, 2026: IOTA staking at 11% APY with 50% of supply locked. 72 validators, Nakamoto coefficient 7.
IOTA Staking Weekly - Mar 9, 2026
Mar 9, 2026: IOTA staking at 11% APY with 50% of supply locked. Total staked down 1.12%, IOTA price drops 4.45%.